Dev Tools > Pipeline > Stage Guide
This guide describes the basics of stages in Pipeline. Click Pipeline Management > +Create Pipeline to create a pipeline. After selecting the pipeline you created, you can add a stage by clicking +Add Stage in the Stage tab at the bottom.
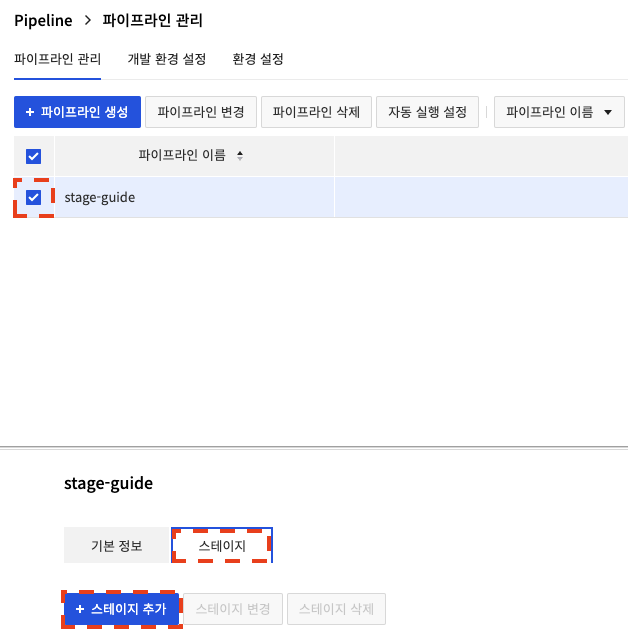
Stages are divided into the following groups. - Source - Build - Deployment - Feature
Source
This is a stage that gets the source code to build.
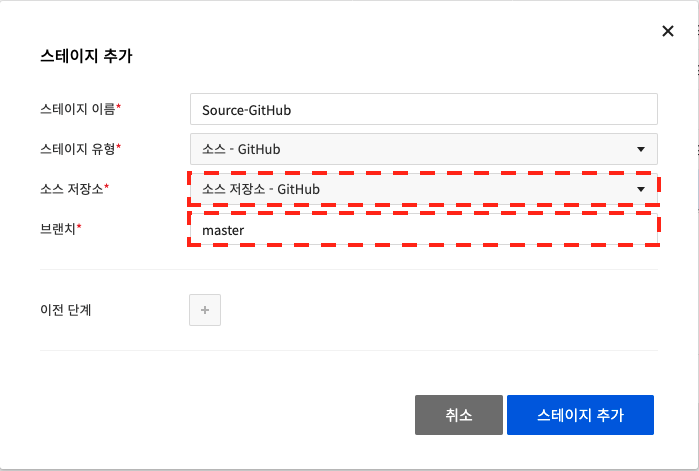
Source - GitHub
You can select the source repository that you added in Source Repository Settings of Environment Settings.
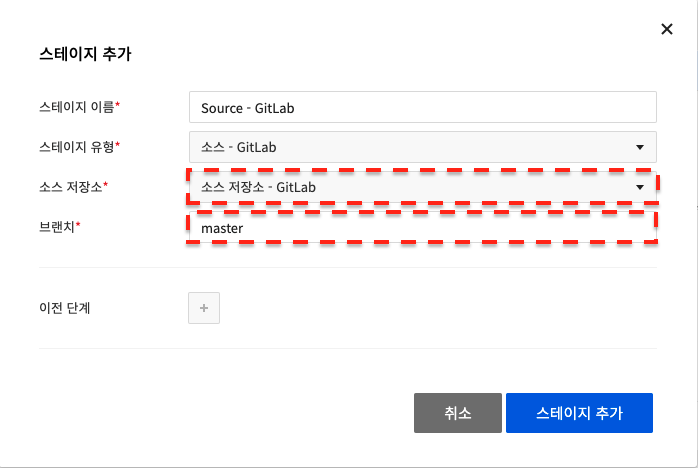
Source - GitLab
You can select the source repository that you added in Source Repository Settings of Environment Settings.
Build
This is a stage to build
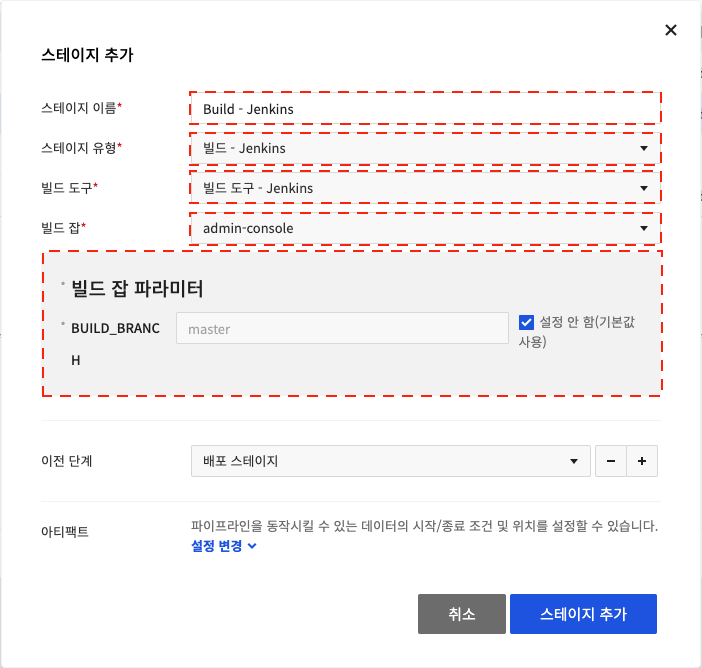
Build - Jenkins
You can build using Jenkins that you configured yourself. You can select the build tool you added in Build Tool Settings of Environment Settings. You can select Build Job and enter Build Job Parameters. You can set Start Condition and End Condition of the artifact. You can decide whether or not to start a stage by setting the Start Condition. You can set an End Condition to set stage output as an artifact.
Build - NHN Cloud Build Tool
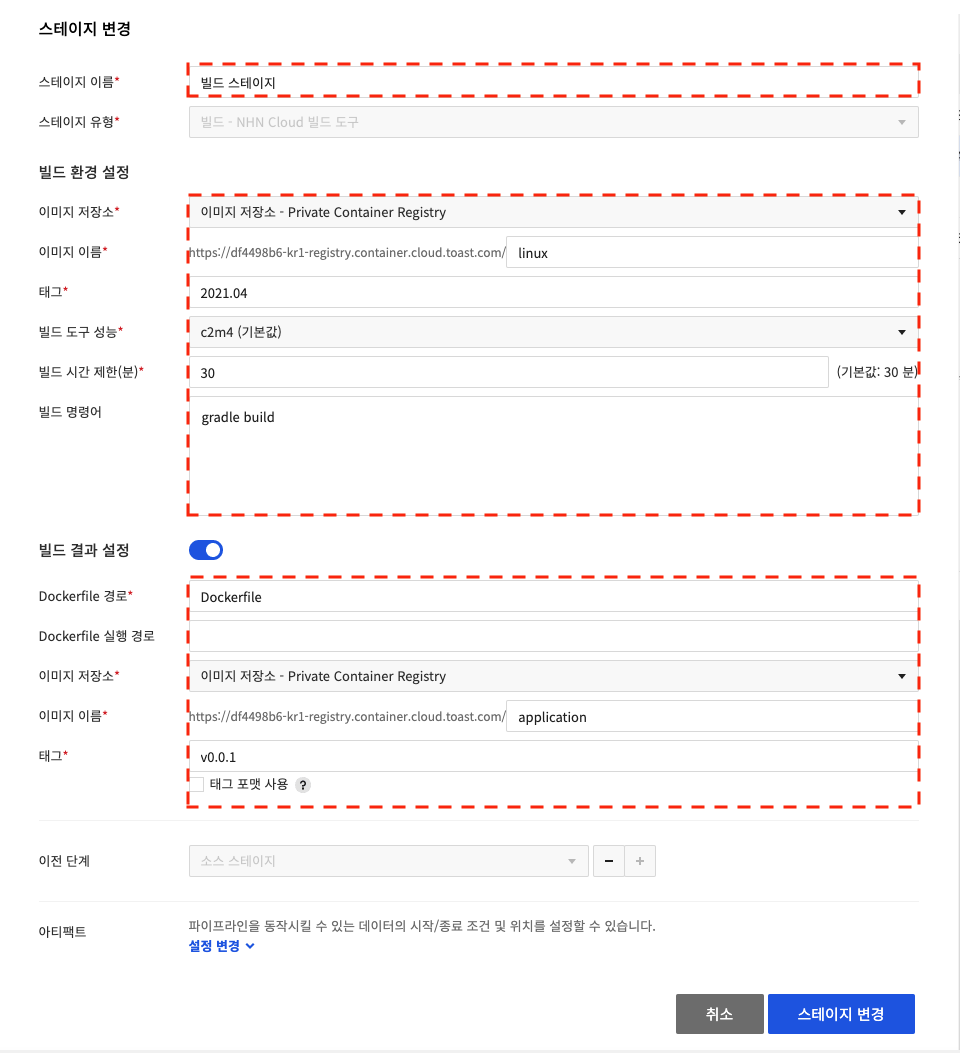
You can use the build tools provided by NHN Cloud. - Build Environment Settings - You can select the image registry you added in the Image Registry Settings in Environment Settings. - Select the Image Name of the environment to build, set the Build Tool Performance, Build Time Limit (minutes), and Build Command.
- Build Result Settings
- Set the Dockerfile Path of the build result, and the Dockerfile Execution Path.
- Select a Image Registry and decide on Image Name, and the build result is pushed to the selected repository.
-
If Use Tag Format is selected, the tag format is fixed, and the image is created with dynamically generated tags in the form of
_{BUILD_NUMBER}. -
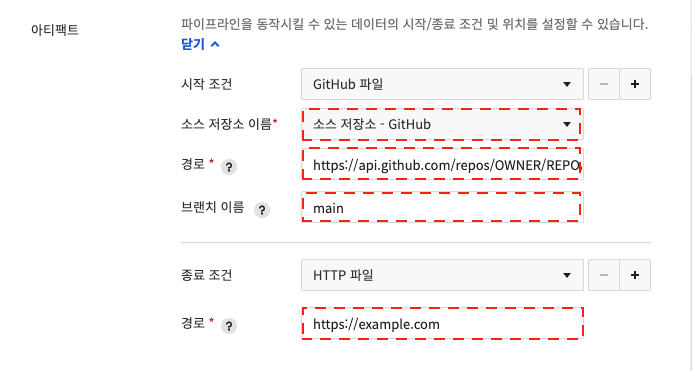
Artifact Settings
- You can decide whether to start stages by setting Start Condtion.
- You can set stage output as an artifact by setting End Condition.
Build - NHN Cloud Build Tool v2
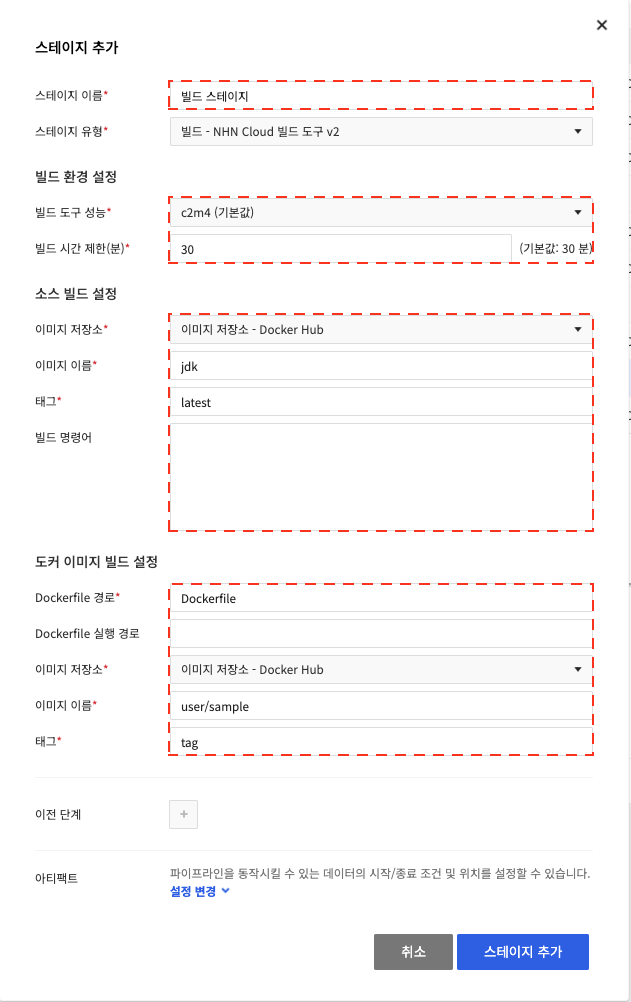
You can use the build tools provided by NHN Cloud. - Build Environment Settings - You can set the performance and timeout of the build tools. - Source Build Settings - You can select the image registry you added in the Image Registry Settings in Environment Settings. - Enter the image name and tagfor the environment you want to build, and set the build command.
- Docker Image Build Settings
- For Dockerfile path, enter the path where the dockefile exists.
- For Dockerfile execution path, enter the path to use for building the Dockerfile.
- Select a Image Registry and decide on Image Name, and the build result is pushed to the selected repository.
-
In Tags, enter tags for the image. If you include the tag format, the tag format area entered will be dynamically replaced.
-
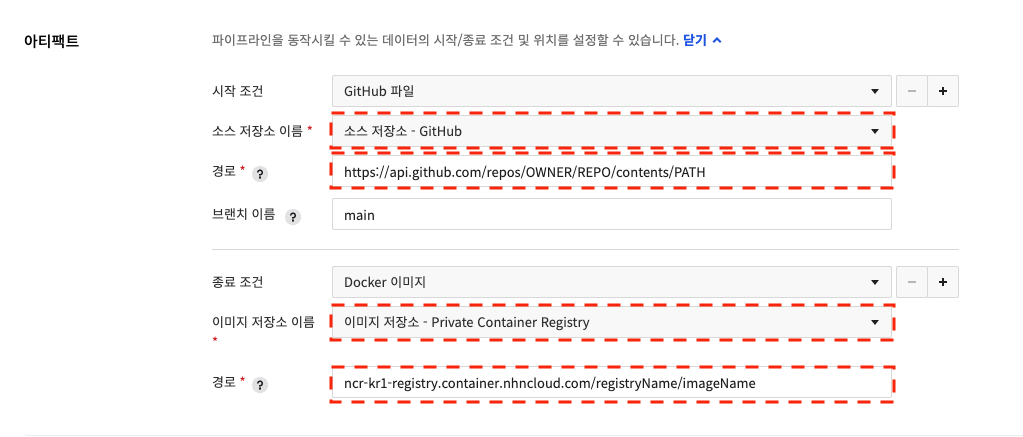
Artifact Settings
- Set Start Condition to determine whether to start stages.
- Set End Condition to set stage products as artifacts.
| Image tag format | Replaced format | Description |
|---|---|---|
| {BUILD_DATE_TIME} | yyyy-MM-dd_HH_mm_ss | This is replaced by the build execution time in the form of year-month-day-hour-minute-second. |
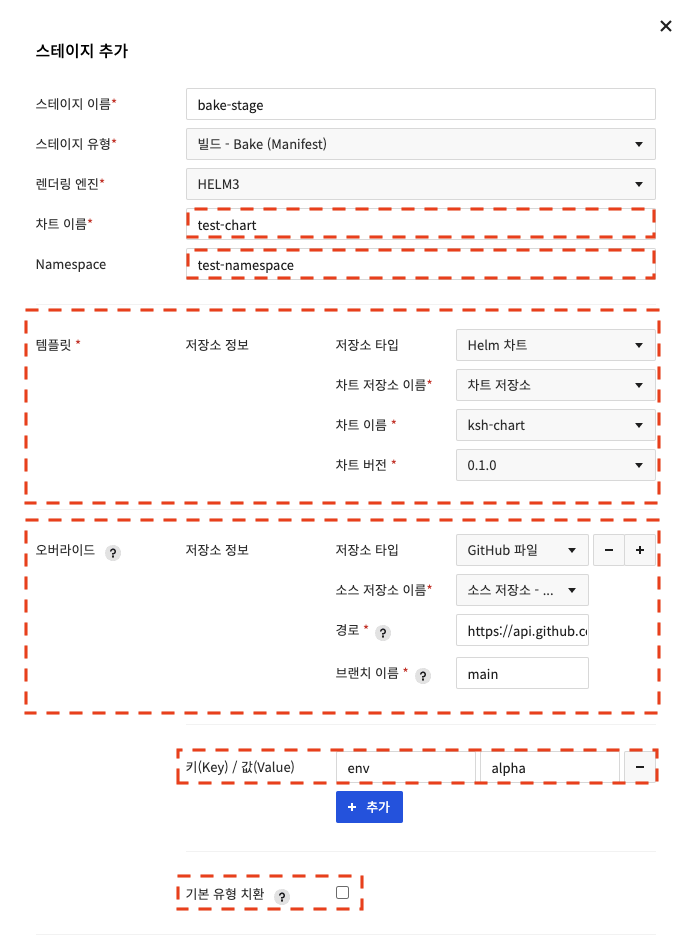
Build - Bake (Manifest)
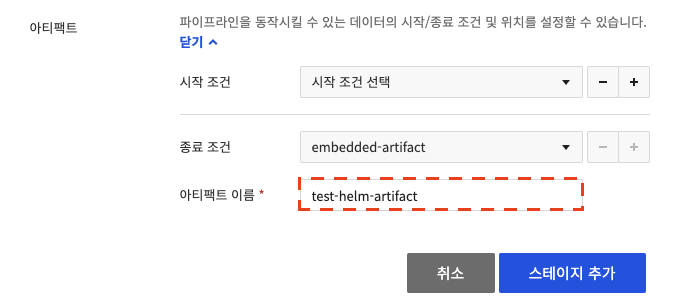
You can build using a Helm package file or Chart Repositorythat users configured themselves. - Set the chart name as the name of the output configured with the Helm engine. - Set the namespace as the namespace of the output configured with the Helm engine. - Template - For repository type, select a repository that is added in Source Repository Settings or Chart Repository Settings of Environment Settings. - When you set a repository type as GitHub file or GitLab file. - Enter the Helm package file path for the path. - Enter the branch of GitHub or GitLab for the branch name. - When you specify Helm Chart for the repository type - For the chart repository name, you can select one of repositories set inChart Repository Settings. - For the chart name, you can choose any chart name available in the chart repository's configuration. - For the chart version, you to select a chart version available in the chart repository's configuration. - Override - Repository Information - You can select in the same way as for templates. - Create a build output using the template as default and replacing it with what you specify in the override. - Key / Value - Enter a value consisting of key and value, create a build result by replacing a specific value. - Replace Basic Type - If the option is checked, when adding the override value, --set is used instead of --set--string. - Artifact - You can set the Start Condition and End Condition of Artifact. You can set a start condition to determine whether to start stages. You can set End Condition to set stage products as artifacts.
Deployment
This is a stage to deploy to the Kubernetes environment.
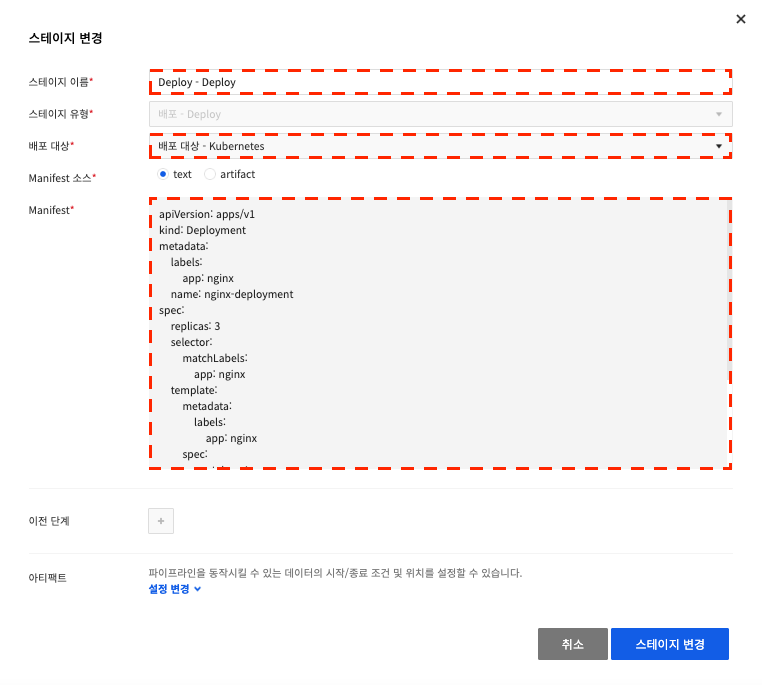
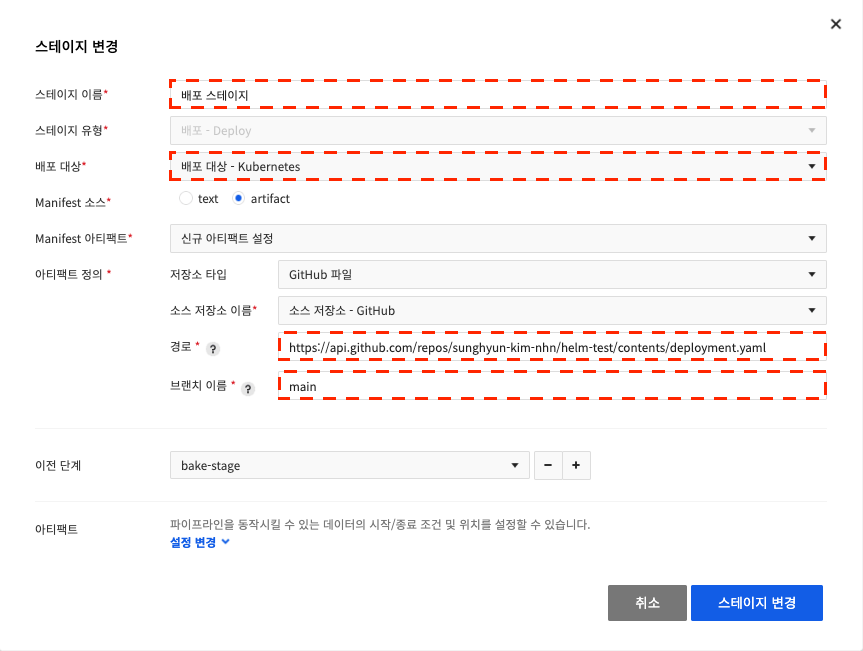
Deployment - Deploy
- You can select the deployment target you added in Deployment Target Settings in Environment Settings.
Enter Stage Name, Deployment Target, and Manifest to use for deployment.
If the tag format is used in the build stage, when the docker image tag of Manifest is entered as
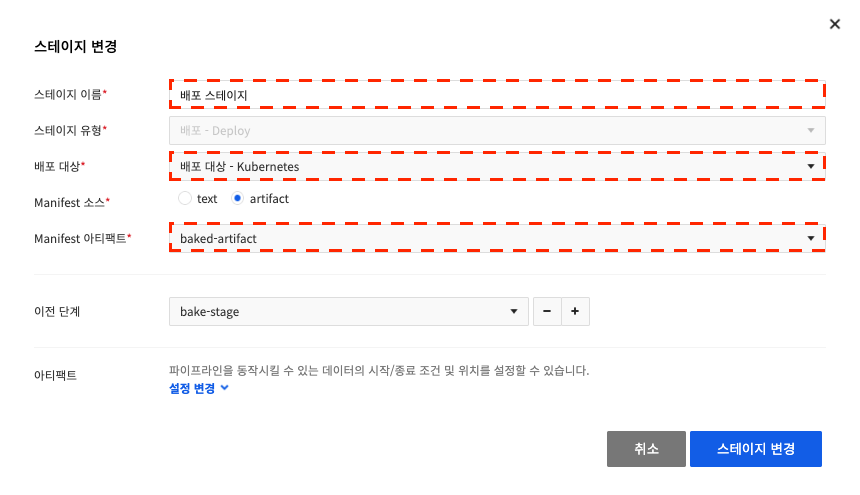
_{BUILD_NUMBER}, you can deploy as the image with the most recent number among the images built in the tag format. See the Kubernetes documentation for how to write Manifest. - You can select Manifest Source as artifacts. The selected artifact must be created in Manifest format.
- You can select an artifact created in the pipeline.
- You can select a specific file from the repository as an artifact.
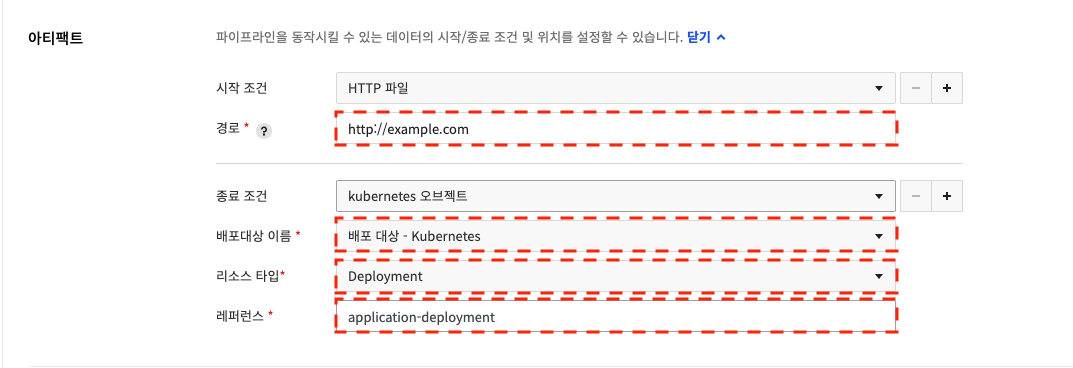
- You can set the Start Condition and End Condition of Artifact. You can set a start condition to determine whether to start stages. You can set End Condition to set stage products as artifacts.
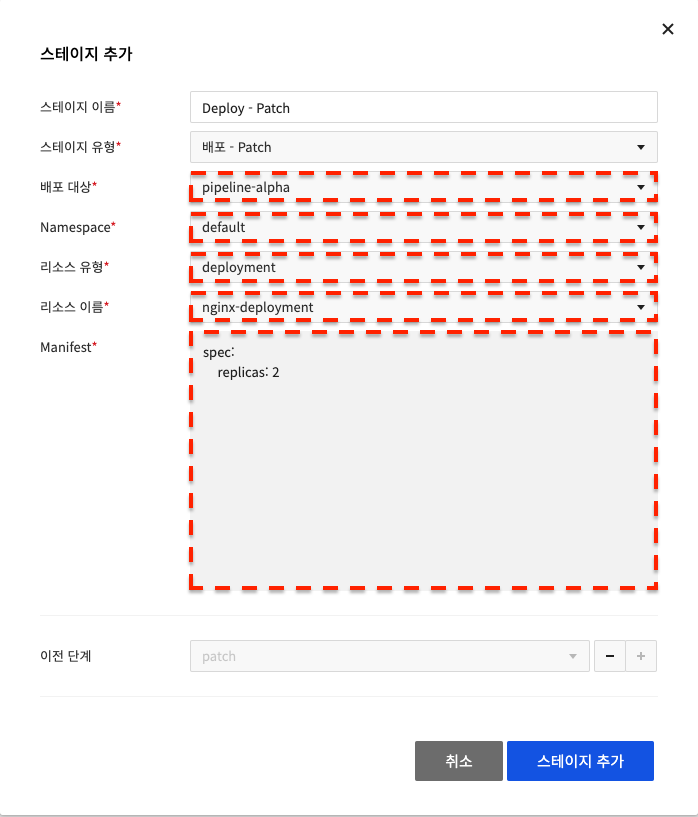
Deployment - Patch
You can select the deployment target you added in Deployment Target Settings in Environment Settings. Enter Namespace, Resource Type, Resource Name, and Manifest to use for deployment.You can modify the information of an existing resource with Patch. See the Kubernetes documentation for how to write Manifest.
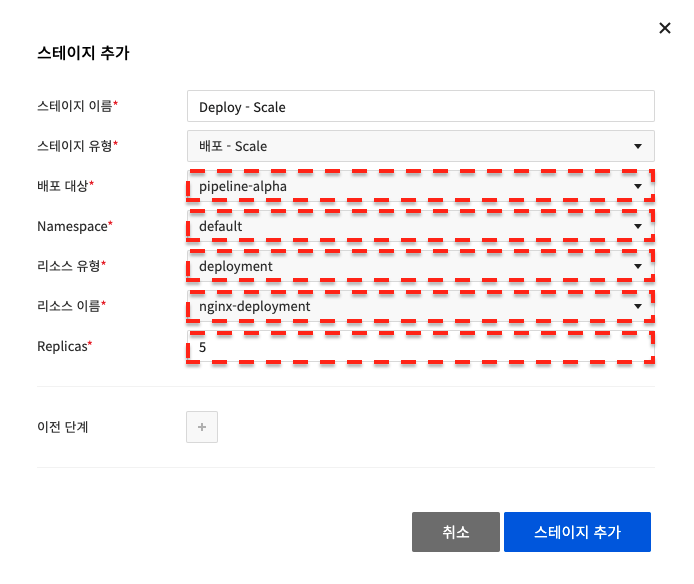
Deployment - Scale
You can select the deployment target you added in Deployment Target Settings in Environment Settings. Enter Namespace, Resource Type, Resource Name, and Replicas. Replicas can be modified with Scale.
Deployment - Rollout Undo
You can select the deployment target you added in Deployment Target Settings in Environment Settings. Enter Namespace, Resource Type, Resource Name, Revision Back. You can roll back to the specified Revision.

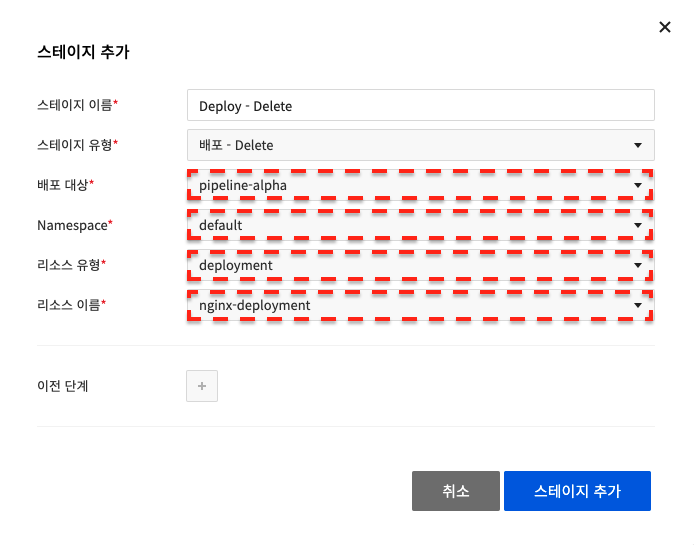
Deployment - Delete
You can select the deployment target you added in Deployment Target Settings in Environment Settings. Enter Namespace, Resource Type, and Resource Name. You can delete the resource.
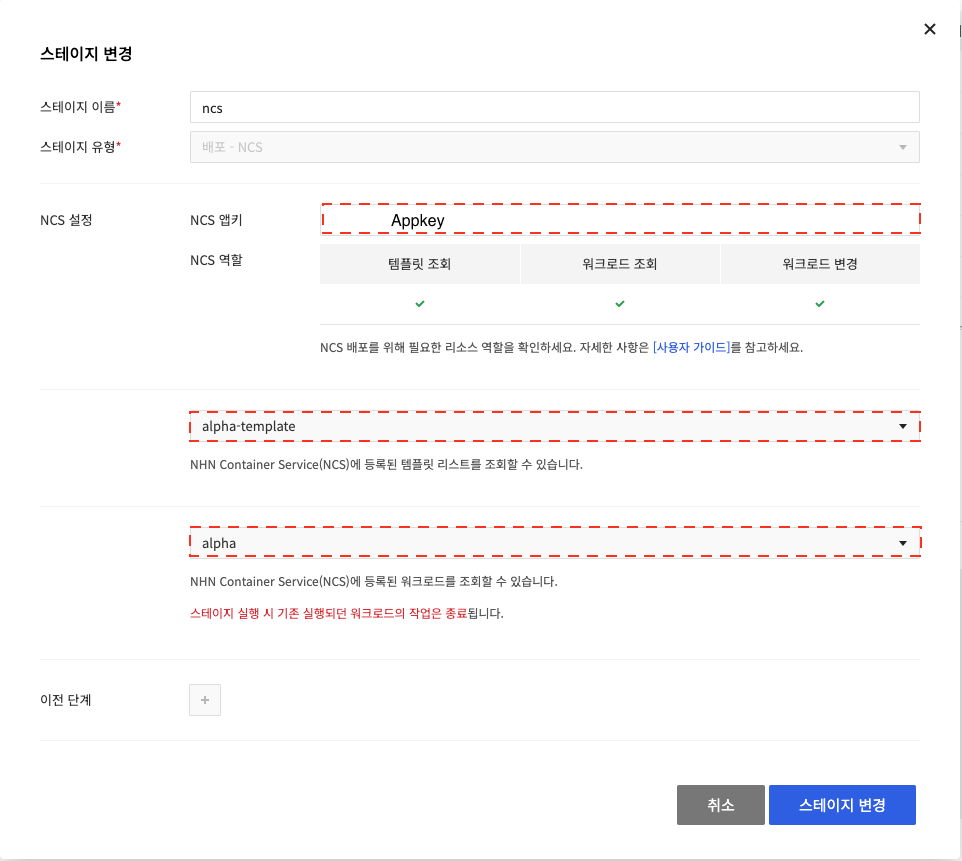
Deployment - NHN Container Service
A stage that can replace NCS workload templates.
If you enter NCS Appkey, you can view NCS Role, template list, and workload list.
You can select a template to change from the list.
You can select a workload for which the template is changed from the list.
Feature
This is a stage to provide additional features.
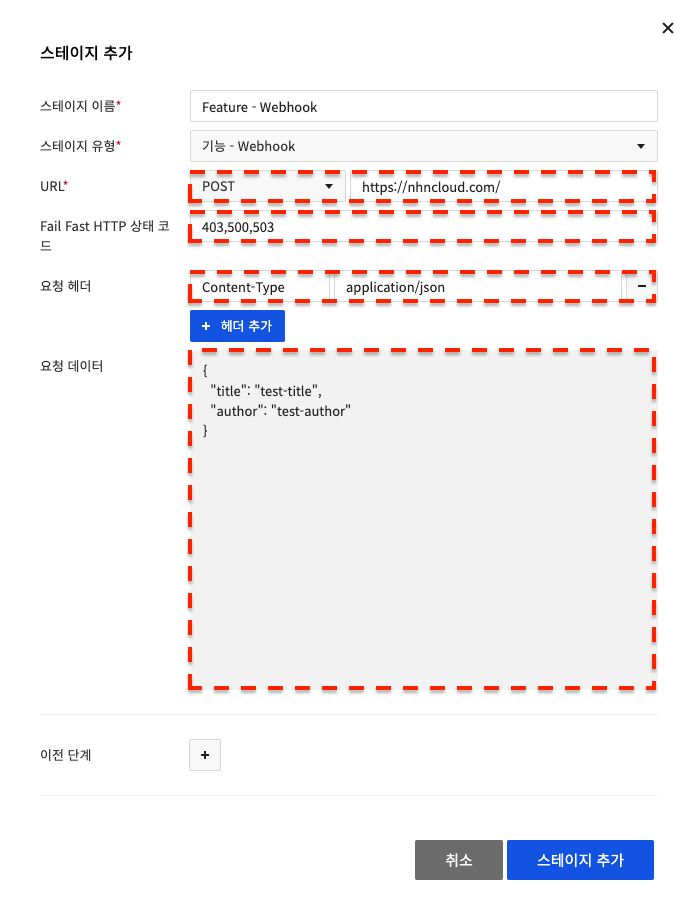
Feature - Webhook
Enter the HTTP method and URL in URL. You can add Request Header and Request Data as needed. If the response value of the webhook is one of the values entered in Fail Fast HTTP Status Code, close the stage immediately.
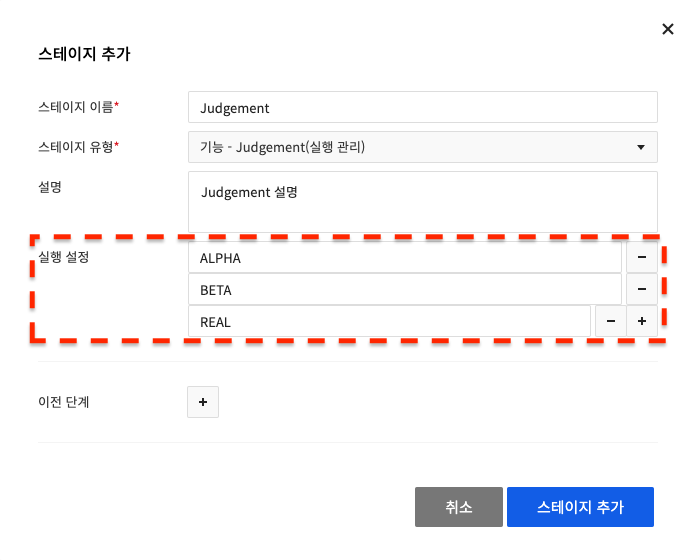
Feature - Judgement (Run Management)
You can fill in Description and Run Settings for the Judgement stage when necessary.
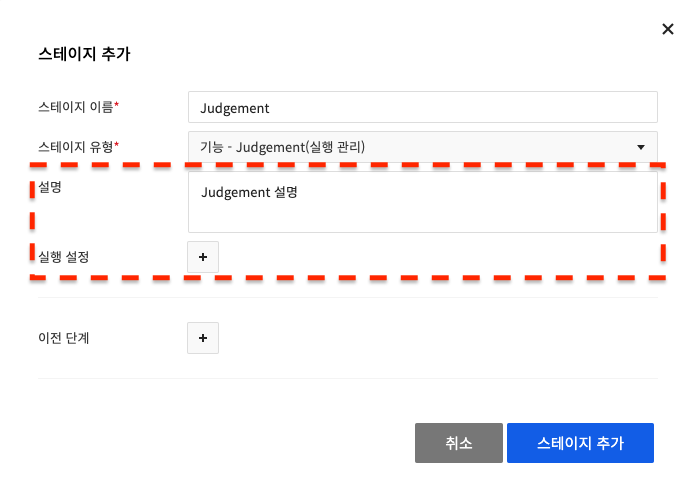
You can Manage Run (run, stop running) for the next stage with or without the Run Settings. If you add Run Settings and select run for the next stage, you can pass the settings to Precondition(Run Condition), the stage to be described, for branching processing.
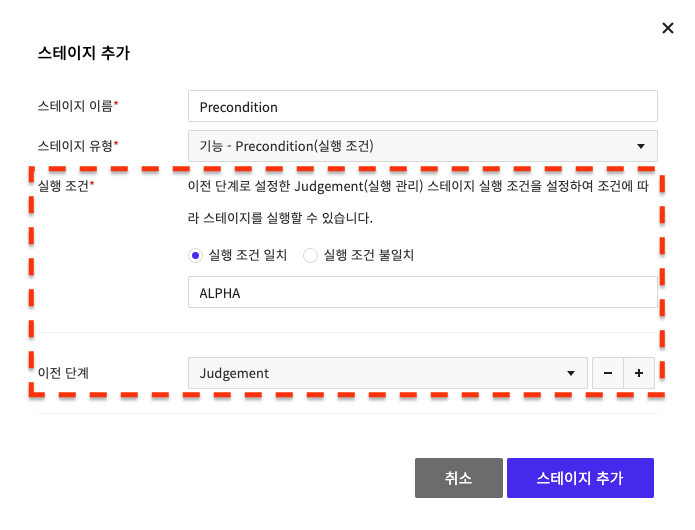
Feature - Precondition (Run Condition)
Decide whether to run subsequent stages based on the Run Condition of the values passed from the Judgement stage set as the previous stage. Decide whether run subsequent stages by selecting either Condition Matched or Condition Unmatched for values from Run Condition and setting values passed from the Judgement (Run Management).
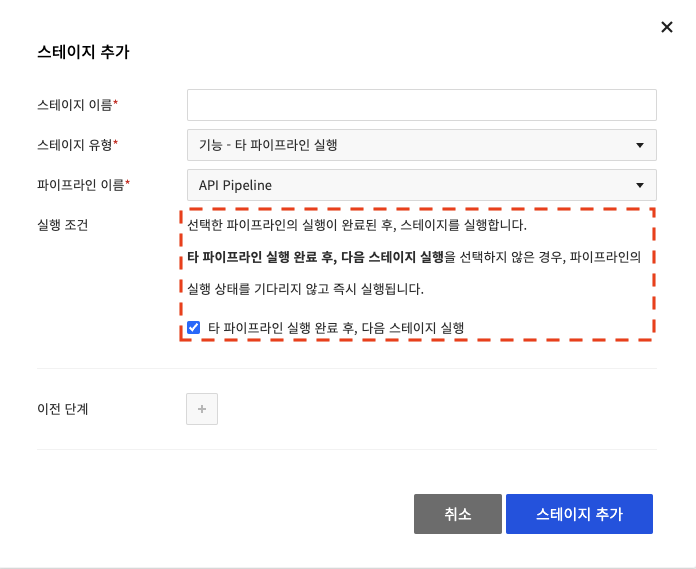
Feature - Run the Pipeline
Run entire other pipelines. Select a pipeline name to run.
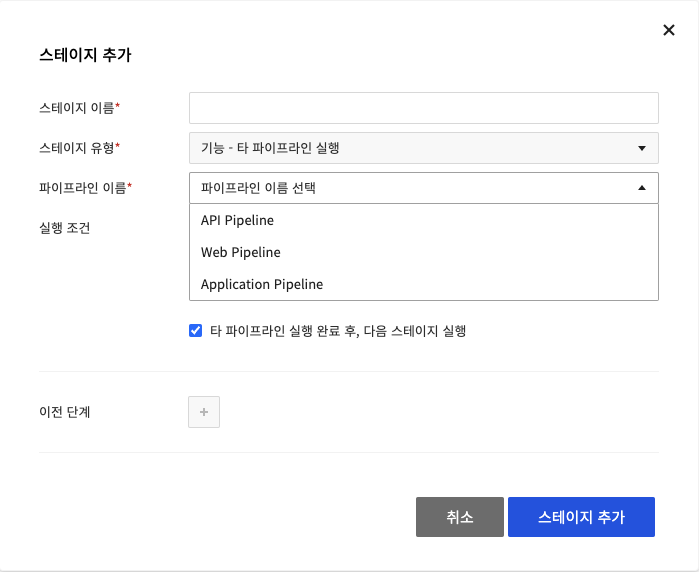
If you uncheck Run Condition, the next stage runs without waiting for the execution status of the selected pipeline.
Feature - Approval Management
Approvers can manage Run Management (run, stop running) for stages after Feature - Approval Management.
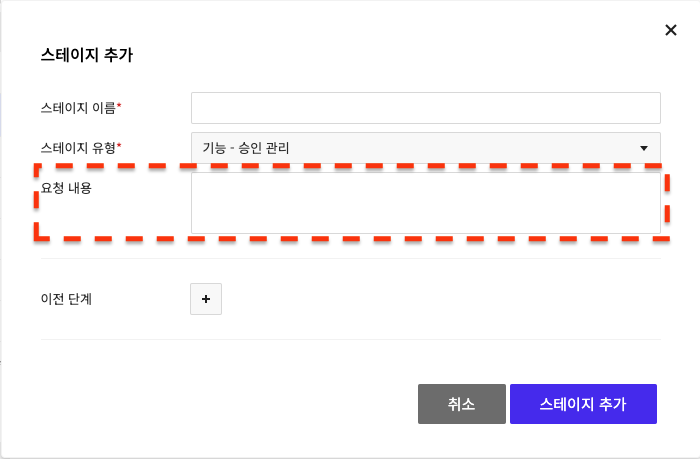
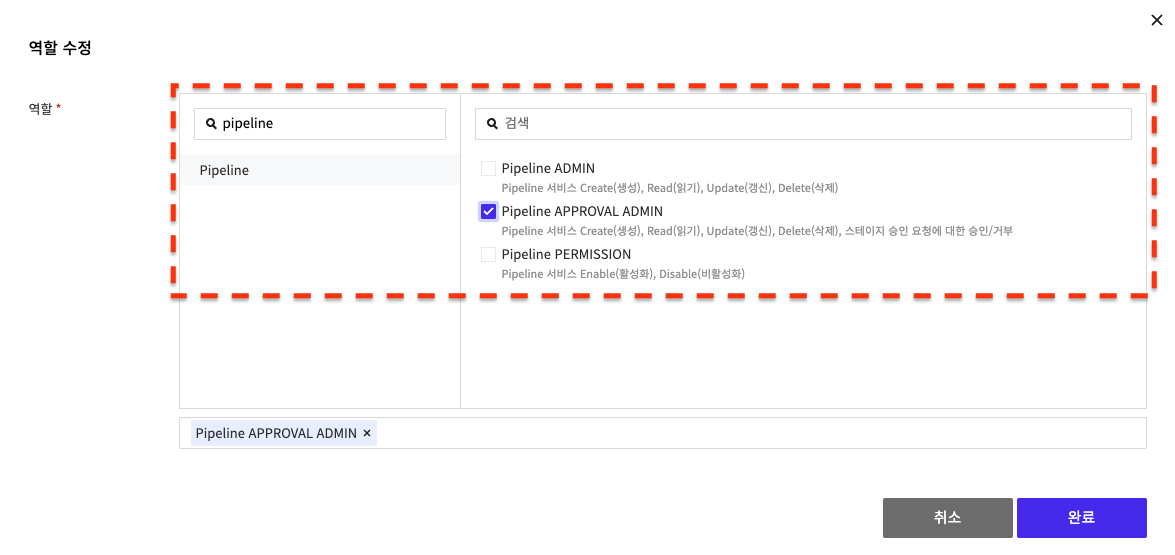
You can write requests in stages, and only users with the Pipeline APPROVAL ADMIN role can perform the Run Management (run, stop running) feature from the approval management stage.
The Pipeline APPROVAL ADMIN role can be granted from the project's Member Management, Role Group Management.
Feature - Run NHN Cloud Deploy Service Deployment
You can run the deployment using the NHN Cloud Deploy service on the stage. - If the command typeof the artifact you want to run the deployment on is SSH, the Run NHN Cloud Deploy Service Deployment is not supported, only Cloud Agent is supported. For more information, refer to the Deploy User Guide.
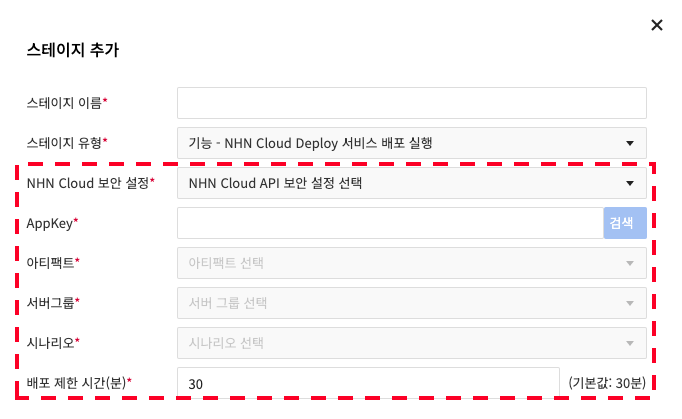
In Environment Settings > NHN Cloud Security Settings, select the security settings you added, and in AppKey, enter the appkey that will use the NHN Cloud Deploy service.
After entering the information, click Searchto get deployment-related information from NHN Cloud Deploy that matches your security settings and Appkey.
You can then select artifacts, server groups, and scenariosto deploy through the NHN Cloud Deploy service.
For Deployment restriction time, specify how long the stage will wait to complete execution (minimum 1 minute, maximum 600 minutes).
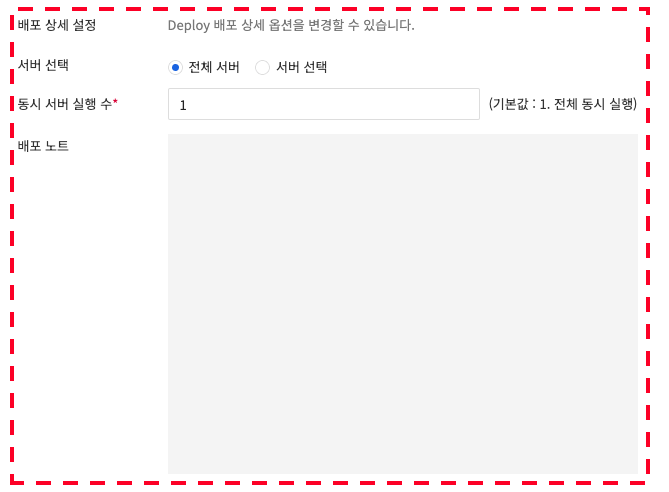
For Deployment Settings Details, you can add conditions for what you want to deploy to.
In Select Server, you can choose which server to deploy to. If you select All Servers, the deployment will target all servers, and if you click Select Server, you can choose which servers to deploy to.
In Number of concurrent server executions, you can select how many servers the NHN Cloud Deploy service will run at the same time. (Default 1, maximum number of servers)
In Deployment Note, you can enter deployment execution information.
For more information, see the Deploy User Guide.